How to Create Custom Embroidery Designs with the Brother M370
Embroidery is an art form that has been cherished for centuries, and with modern embroidery machines like the Brother M370, it has never been easier to create stunning, intricate designs. The Brother M370 is a versatile sewing and embroidery machine that allows users to bring their creative ideas to life with precision and ease. Whether you’re an experienced embroiderer or a beginner, this guide will walk you through how to create custom embroidery designs with the Brother M370. How to Create Custom Embroidery Designs with the Brother M370
1. Getting Familiar with the Brother M370
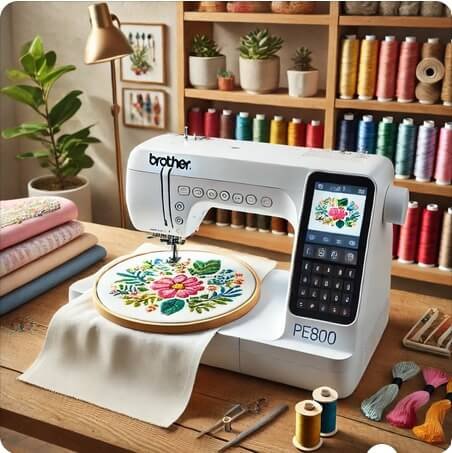
Before diving into creating custom designs, it’s important to familiarize yourself with the Brother M370 machine. The M370 offers both sewing and embroidery functionalities, making it a perfect choice for individuals who want to combine the art of sewing with embroidery.
The Brother M370 is equipped with a wide variety of built-in embroidery patterns and stitches. However, creating your own custom designs is what truly unleashes your creativity. To do this, you’ll need a few essential items:
- Embroidery Thread: Select threads that are suitable for your fabric.
- Stabilizer: This provides support to your fabric while you embroider, ensuring smooth results.
- Design Software (Optional): Brother’s own PE-Design software or other embroidery design software can help create complex designs that can be imported into the machine.
2. Choosing the Right Fabric and Thread for Custom Designs
When creating custom embroidery, the fabric and thread you choose will significantly impact the final result. For the Brother M370, you have the flexibility to choose from a wide range of fabrics, including cotton, polyester, denim, and even stretchy fabrics. However, make sure to use the appropriate stabilizer to support the fabric and prevent puckering.
For thread, use embroidery thread that is designed for machine use. The most common types are rayon or polyester threads, which provide vibrant colors and durability. Depending on your design’s complexity, you may also choose specialty threads like metallic or variegated threads for added texture and effect.
3. Designing Your Custom Embroidery Pattern
Option 1: Use Built-in Designs
The Brother M370 comes with a variety of built-in embroidery designs that you can personalize with names, initials, or text. To do this:
- Select a Design: Using the machine’s touchscreen display, choose a preloaded design from the design library.
- Modify the Design: Customize the design by adjusting its size, rotation, or positioning.
- Add Text: You can add custom text to the design using the built-in font options. Adjust the font style and size to fit your design.
Option 2: Create a Custom Design Using Software
For those who prefer to create intricate and unique embroidery designs, using embroidery design software is a great way to go. Programs like Brother’s PE-Design software or third-party software like Wilcom or Hatch allow you to create and edit designs in detail.
Here’s how you can create your own custom design:
- Choose Your Software: Install embroidery software compatible with your Brother M370 machine. The Brother PE-Design software allows you to design your pattern on a computer and transfer it to the machine.
- Create the Design: Start by selecting the type of design you want to create. You can draw freehand, convert an image into embroidery format, or use the software’s pre-designed shapes and patterns.
- Refine the Design: Modify the design by adjusting stitch types, stitch density, and color palette. Fine-tune the design to suit your vision.
- Save the Design: Once your design is complete, save the file in a format compatible with the Brother M370, such as PES or DST.
4. Transferring Your Custom Design to the Brother M370
Once you’ve created or selected your custom embroidery design, it’s time to transfer it to the Brother M370. There are several ways to do this:
- Using a USB Drive: Save the design file on a USB flash drive and insert it into the machine’s USB port. The Brother M370 will automatically read the file and display it on the screen.
- Direct Connection via Computer (if applicable): Some versions of the Brother M370 can connect directly to a computer via USB. Use the provided software to transfer the design directly to the machine.
5. Setting Up the Brother M370 for Embroidery
With the design now loaded onto the machine, it’s time to prepare the Brother M370 for embroidery. Follow these steps to set up the machine:
- Attach the Embroidery Hoop: The Brother M370 uses a snap-on embroidery hoop to hold your fabric in place. Choose an appropriate size hoop for your design and securely attach it to the machine.
- Load the Fabric: Place your fabric and stabilizer onto the hoop. Make sure the fabric is taut but not too tight to avoid puckering.
- Thread the Machine: Thread the machine with the desired embroidery thread. Choose the correct color thread for each part of your design.
6. Starting the Embroidery Process
With everything set up, it’s time to start embroidering. Follow these steps:
- Select Your Design: Use the touchscreen display on the Brother M370 to select the custom design that you transferred.
- Preview the Design: Before starting, you can preview how the design will look on your fabric. The machine will show a digital representation of your design on the screen.
- Adjust Settings: If necessary, adjust the stitching speed, thread tension, or other settings. The Brother M370 allows you to fine-tune your embroidery process for optimal results.
- Start the Machine: Once everything is ready, press the start button. The machine will begin stitching your custom design onto the fabric.
7. Post-Embroidery Care
After the embroidery is complete, carefully remove the hoop from the machine. Gently remove the fabric from the hoop and trim any loose threads. If you used stabilizer, you can tear it away or dissolve it depending on the type of stabilizer used.
It’s important to inspect the design for any imperfections. If necessary, make adjustments to the design or stitching tension and re-embellish the fabric to achieve a flawless result.
8. Tips for Success in Creating Custom Designs
- Practice Makes Perfect: Don’t be discouraged if your first few attempts aren’t perfect. Keep practicing and experimenting with different designs to improve your skills.
- Use Design Software Wisely: Take advantage of the many features available in embroidery software, such as adjusting stitch density, adding text, or converting images into embroidery-friendly designs.
- Choose the Right Fabric and Thread: Using the correct fabric and thread is key to achieving professional-looking results. Ensure that your fabric matches the design’s complexity and the thread complements the fabric.
- Test the Design: Before embroidering your custom design onto your final project, test it on a scrap piece of fabric. This allows you to check for any design flaws or stitching issues.
Conclusion
The Brother M370 is a versatile machine that provides endless possibilities for creating custom embroidery designs. Whether you use the built-in features, design your own patterns, or import designs from software, this machine makes it easy to bring your creative visions to life. With practice, you can achieve beautiful, professional-quality embroidery on a variety of projects, from home décor to personalized gifts. Start experimenting with custom designs today and elevate your embroidery skills with the Brother M370!

